How to Remove Solder: A Complete and Practical How-To Guide to Desoldering Techniques
Desoldering a circuit board and component is a basic skill you need if you work with electronics, whether you’re doing upgrades, repairs, or just reclaiming parts. Desoldering is the means by which you remove and swap out electronic components without damaging either the component or the board. In this all-in-one how-to article, we will cover the best methods to remove solder, how to operate each major tool from a desoldering station to a simple solder wick, the part that flux plays, and how to protect your printed circuit board. Let’s get started!
Introduction to Solder and Desoldering
Desoldering is an important process in electronics, because it allows you to remove the solder from a printed circuit board (PCB) in order to repair, upgrade, or rework it. Whether you are taking out a bad component or need to come up with new designs, you need to know how to melt the solder and break a solder joint.
Why is desoldering often needed?
- Upgrade or fix electronics by removing or replacing components
- Salvage valuable parts from boards without damaging them
- Clean up or improve solder joints by wicking away existing solder and applying new solder
What is Solder? Why Does Solder Removal Matter?
Solder is a metallic glue, which forms an electrical connection and a mechanical bond between the component and the board surfaces. Heating the solder to the right iron temperature makes a bond that will last, but occasionally you want to remove the solder – to repair, replace, or to remedy errors.
Purpose of Solder and Desoldering
- Component replacement:Allows the solder to be cleared from mounting holes or pads without damaging pads or traces.
- Circuit modification:Remove solder from a circuit to add, reposition, or substitute parts.
- PCB repair: Clean faulty or cold solder joints and apply new solder for reliable connections.
Quick Fact Table
Task | Why Remove Solder? | Tool(s) Most Commonly Used |
Faulty Part Replacement | Make room for a new component | Pump, solder wick, desoldering station |
Cleaning Solder Pads | Prepare for new solder application | Braid, pump, braid and iron |
Salvage Valuable Parts | Reuse in other circuits | Hot air, vacuum desoldering, heated tweezers |
Challenges in Removing Solder
While the process of removing solder seems simple—you use an iron to melt the solder—there are several challenges:
- Risk of damaging the board:Overheating can lift pads or traces.
- Difficulty with lead-free solder:Requires a higher iron temperature and more liquid flux.
- Board density:Many modern printed circuit boards have closely packed parts and tiny solder balls or tight vias.
- Solder bridges:Excess or extra solder can create shorts or bridges between pins if not cleaned away.
- Residual solder:Solder might stay behind in holes or on the underside, making part replacement hard.
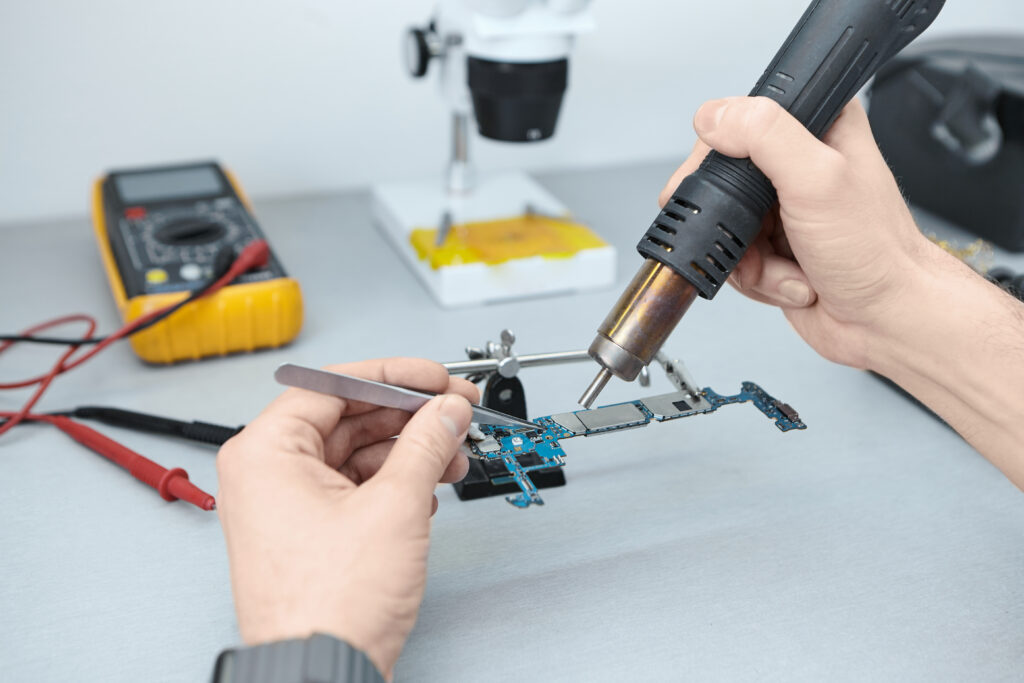
Essential Tools and Equipment for Desoldering

Desoldering Devices:
- Soldering iron:A hot iron is used to melt the solder.
- Desoldering pump (solder sucker):Used to suck up the solder while it’s in its liquefied state.
- Solder wick (desoldering braid):Copper strip that wicks away excess solder—place the desoldering braid onto a joint, apply a hot iron, and the braid will soak up the fluid solder.
- Desoldering station:Professional tool combining an iron and vacuum desoldering for fast, clean work.
- Hot air stations/heat guns:Useful for removing multiple connections (such as in SMD).
- Heated tweezers:Allow removal of small chip components without damaging them.
- Capsule thermal vacuum/pressure systems: Advanced for industrial or multilayer PCBs.
Support Tools
- Tweezers and heat sinks
- Liquid flux and application of flux pens
- Isopropyl alcohol for cleanup
- Compressed air for removing tiny solder balls
- Gloves and eye protection (to avoid inhaling solder or fumes)
Different Techniques to Remove Solder from a Circuit Board
1. Desoldering Wick/Braid Method
- Place the desoldering braid ontothe area with the soldering iron.
- The braid will soakup liquefied solder, cleaning the pad.
- Braid often comes pre-fluxed to improve wicking.
- Use wick to get the last solder particles off board surfaces.
2. Desoldering Pump Method
- Use the soldering iron to meltthe solder, then quickly place the pump tip over the joint.
- Trigger the pump to suck up the solder.
- Repeat if needed to clear the joint.
3. Soldering Iron Alone
- Melt the solder and tap or flick the board to remove solder (caution: may spread molten solder around, forming tiny solder balls).
4. Hot Air Station/Heat Gun
- Use controlled heat to melt; remove the component and board for SMD parts.
- Great for removing extra solderor reflowing solder on the other side of the board.
5. Heated Tweezers
- Specifically designed for SMD—allows the solder to liquefy, then simply lift the component off.
6. Vacuum Desoldering Stations and Capsule Vacuums
- Professional techniques to remove solder from a circuit without pads lifting; use suction and heat for the quickest and cleanest results.
How to Remove Solder from Circuit Board Holes
- First, use an iron to melt the solderon one side of the pad.
- Use a pump or wick to getthe solder out of the hole.
- For the best result, sometimes you’ll need to add more solder (paradoxically) to improve wicking—new solderre-activates the joint and helps to remove the old.
- For blocked vias or multi-layer boards, alternate pump and braid.
- In rare cases, a micro drillcan clear stubborn holes after the desoldering process.
Removing Old Solder and Solder Residue
- Application of Flux:Coat the existing solder—liquid flux is best for aged or oxidized joints.
- Add more solderto the joint. The extra solder helps liquefy stubborn old solder and improve heat transfer.
- Wick awaythe newly liquefied solder with a braid or pump.
- Clean up remaining solder particlesand inspect for a clean pad ready for new solder.
How to Remove Solder Without a Wick
If you don’t have a desoldering wick handy:
- Use a desoldering pumpto vacuum up melted solder.
- Try the “solder and flick” method with care.
- Use hot airand tweezers for SMD parts.
- Specialized vacuum desolderingor capsule vacuum devices can handle even tough situations without destroying the board or component.
- For hard-to-remove solder, gently “add more solder” to the joint before getting out the desoldering pump — fresh solder lowers the melting point and makes removal easier.
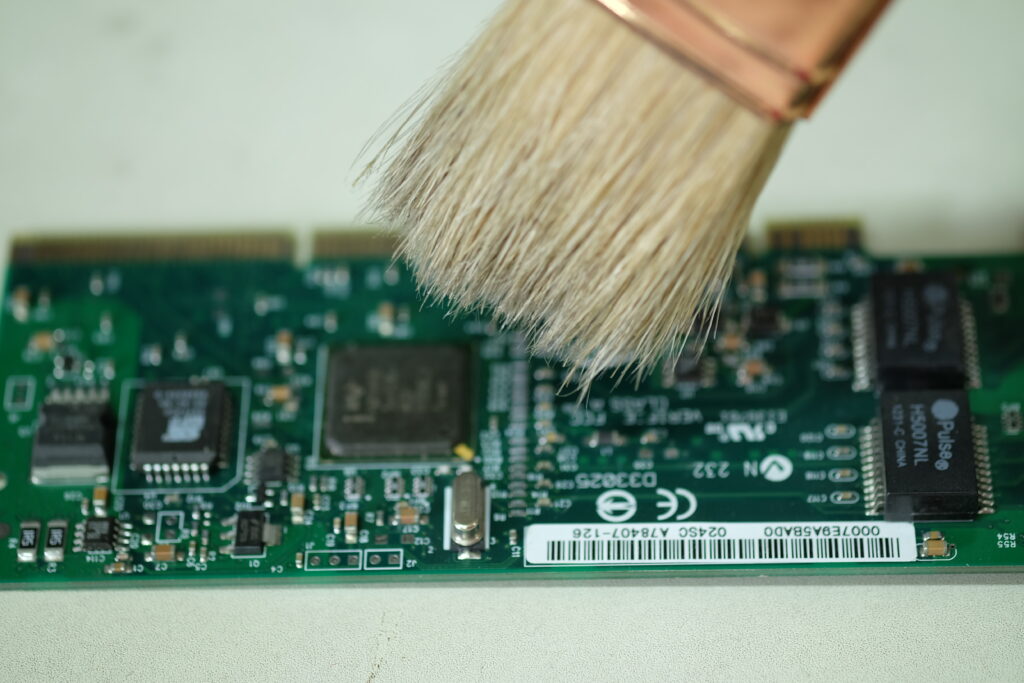
How to Remove Solder Flux After Desoldering
Sufficient cleaning after the desoldering process is important – not only for aesthetics, but for function and reliability.
Steps to Remove Flux and Solder Residue from a Circuit Board:
- Apply Isopropyl Alcohol:Flood the area with alcohol (at least 90%) to loosen flux residues and any tiny solder particles.
- Scrub Gently:With the soldering iron, use the brush to rub the area. Concentrate on the location you want to desolder, and where the solder flew or where it created balls of solder.
- Inspect:Make sure to remove all flux residues and excess solderballs, in particular on board surfaces, under components and in vias.
- Repeat if Needed:A second cleaning might be required if residues or solder balls are still sticking.
- Dry Thoroughly: Ensure the board is dry before soldering again on the cleaned pads.
Step-by-Step Guide: How to Remove Solder Safely
This is a canned workflow to desolder a pcb with best practice at each step for best results.
1. Prepare Your Workspace
- Ensure proper ventilation to avoid inhaling solder fumes.
- Secure your circuit board in a holder.
- Set your iron temperature according to the type of solder (e.g., 350°C for leaded, up to 400°C for lead-free).
2. Apply Flux
- Apply liquid flux or flux pen generously where you need to remove solder.
- The application of flux is critical for a good, clean removal.
3. Melt the Solder
- Position the soldering iron on the existing solder.
- Wait until you see liquefied solder, then move quickly to removal.
4. Remove Solder
- With Desoldering Braid:Place the wick directly onto the melted solder. Place the hot iron on top. The braid will soak up molten solder as you hold it. Lift braid and iron together once sufficient solder is wicked away.
- With Pump:Soldering iron to melt, then position pump over the joint and suck up the solder. Repeat as needed.
- With Hot Air:Heat area evenly; when solder is melted, remove the component with tweezers.
- Special Tools:Use vacuum desoldering or desoldering station for easier professional jobs.
5. Check and Clean
- Inspect beneath components and pads without leaving any residue.
- Use alcohol and a brush to clean off all flux and solder particles.
6. Inspect and Test
- Use a magnifier to check for clean holes, intact pads, and no hidden solder bridges.
- For new parts, apply “solder for new” only once the area is clean.
Post-Desoldering Cleanup
- Remove all remaining solder, tiny solder balls, and flux residues.
- Clean the area with isopropyl alcohol to ensure no solder sticks or foreign matter remain.
- Ensure pads, holes, and traces are ready for the next solder connection or component placement.
- Let the board cool and dry before handling or storing
Troubleshooting Common Desoldering Problems
Problem | Likely Cause | Solution |
Solder won’t melt | Low iron temp, no flux, lead-free solder | Use higher iron temperature, add flux, add more solder for better melting |
Pad lifts | Excess heat or pressure | Work quickly, use right tool, avoid overheating |
Solder bridge forms | Solder overflows after removal | Use wick; apply flux to prevent bridging |
Holes blocked | Solder remains in hole | Alternate using pump and wick to get stubborn solder |
Safety & Best Practices for Solder Removal
- Avoid inhaling solder fumes:Always work with a fume extractor or in a well-ventilated area.
- Use the right iron temperature:Too hot, and you risk board damage; too cold, and you can’t melt the existing solder promptly.
- Handle hot iron and components with care:Prevent burns and accidental PCB damage.
- Use ESD protection:Protect sensitive components from static charges while removing solder from a circuit.
- Dispose of solder waste properly:Don’t leave solder particles or tiny solder balls on your workbench.
Frequently Asked Questions: How to Remove Solder
Can I reuse a desoldered component?
Is a desoldering station worth it for home use?
What if solder remains after using a pump?
How can I remove solder on the other side of the board?
Recommended Products for Effective Desoldering
Product | Best For | Brands / Notes |
Soldering Iron | Basic solder melting and removal | Hakko, Weller, TS100 |
Solder Wick/Desoldering Braid | Cleaning up pads or traces | Chemtronics, MG Chemicals |
Desoldering Pump | Through-hole removal | Engineer, Velleman |
Hot Air Station | SMD desoldering, reflow | Quick, Hakko |
Vacuum Desoldering Station | Professional board and pin removal | Hakko, Aoyue |
Conclusion
LingKey makes you confident to repair, upgrade and mod an electronic device by guiding you with how to solder and desolder. By learning (and using) the desoldering stations, solder wick, solder suckers and the proper application of flux and cleaning procedures you’ll become a more professional and efficient worker.